Self Transporter: how to share your Self code
In my previous post, I talked about Self and gave a general tour of the language and the programming environment. I mentioned that Self was an image-based programming language. Of course, if you want to develop a Self application with multiple people, an image is not suitable for collaborating (except in real-time – we’ll come back to that in a later post). Your Self image contains everything in your programming environment (provided you don’t forget to save it!), including the active morphs you have on the screen, and stuff you are working on. Therefore, obviously, it is not possible to collaborate using your world images on version control.
So then the question becomes “How can we extract just the parts of our application so that they can be re-imported to other Self worlds independently?” And the answer to that is the Transporter system.
But before we can talk about Transporter, we first need to understand what Self considers a module.
Self Modules
We previously talked about slots and objects in Self and said that an object is a collection of slots. Well, all of our world is a huge hierarchy of objects created by connections of slots. Obviously it would be very hard to put everything together at once. Besides, we might want to plug some stuff out or plug new stuff in at will.
That’s where Self modules come in. For the most part, modules behave like you would expect from other programming languages: modules are collections of objects. However, they differ from regular programming language modules in that they also contain individual slots. That is, you can set a module for any slot, in any object. This makes Self’s modules incredibly powerful in extending the language: by making the granularity of modules in Self at the slot level, you can extend the standard library as you wish, adding new slots.
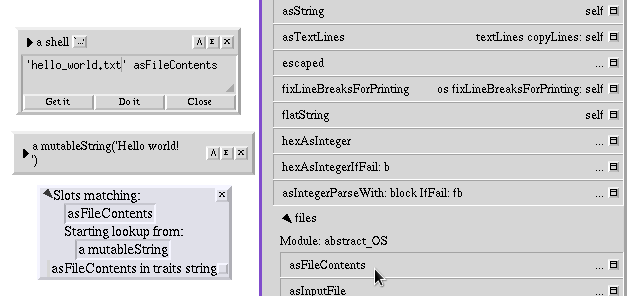
asFileContents is probably not something you would expect to be on
traits string.
In that screenshot you can see that right after the category name (files),
there is a bit that says Module: abstract_OS. In the programming environment,
at the top of each object and category, there is a summary of the modules that
own the slots. If there is only one module for all slots, it will show the
module name like above; if there are multiple, it will abbreviate it and show
the module count instead; and if there are none, it will show
no filed-out slots (might be familiar if you followed the previous post).1
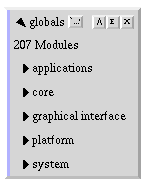
The module summary
for globals, using the morphic snapshot.
We will soon look into how we can create our own modules. For now, let’s understand how the Transporter system works.
The Transporter system
The Transporter system is a way to reliably extract a module from a Self world while the code is still running. It accomplishes this by getting the representation of each object and slot that belongs to the module (and is well-known2) and transforming them into a series of messages which can then be written to a file. This file is a text file which then be shared as you would with any other text file.
The handbook has an excellent section on how Transporter works and the problems that were faced. You should definitely check it out, but to summarize, live objects and slots do not provide enough information to accurately represent them in source code (a slot might be computed initially, how to handle slots that reference another module’s objects, how to handle immutable objects), so in order to preserve that information for filing into (loading into) another Self world later, the information is set by the programmer as annotations on the objects and slots. Let us now look at what annotations are and what kind of annotations there are.
Self Annotations
To solve the problem of storing meta-data on the object regarding its creation,
Self has a syntactic element called annotations. Annotations are strings that
are stored with the object or slot and can then be fetched by the environment.
The default Self environment and Transporter separates different keys and values
in an annotation with \x7f. In text form, slots and objects can be annotated
using curly braces.
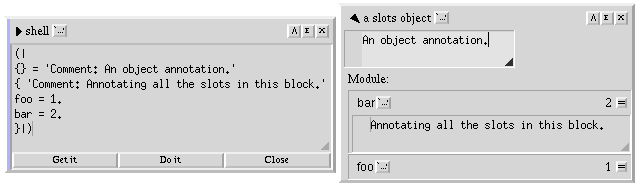
Annotations in text form.
In an object, there are a few annotations that are relevant to the Transporter system, and the environment provides a graphical way to modify them.
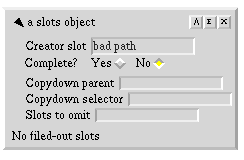
The annotations that are available on an object.
In the screenshot above, the first two slots are related to Transporter. We will come back to copy-down in a later post, so ignore the last 3 slots for now.
- The creator slot is the well-known path for this object. All objects that refer to this object must use the creator slot to do so. This also allows your object to get its own name, as we will see later in this blog post.
- The Complete? flag allows us to determine whether there is an expression such that, provided all required objects are filed in, lets us recreate this object 1:1. This is used by Transporter to write simple expressions to recreate slot contents.3
An important thing to note is that, for an object to be accurately recreated, it must either be complete or it must have a well-known creator slot.

traits string
has a well-known creator path: you can always access it by evaluating
traits string.

This textLines
object is complete: when filing out, Transporter will simply write
‘foo’ asTextLines. You can create the object this way yourself.
For slots, we have a few more annotations. They determine how the slot will be represented when Transporter files them out.
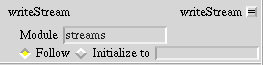
The annotations that are available on a slot.
This one is much simpler. A slot has a module it belongs to, and has two modes when determining how to initialize it when filing it in later. If Follow is selected, then Transporter will try to write out whatever’s the value of the module; if Initialize to is selected, however, Transporter will place the expression that’s typed in the text box as the slot’s value.
Okay, now that we know all of this, we can write our own module and file it out, so let’s do it.
Writing our own module
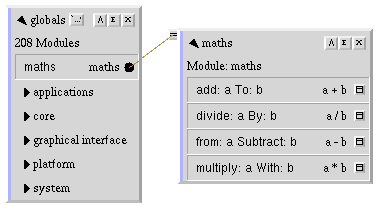
Here, I am creating an object with basic mathematical operations.
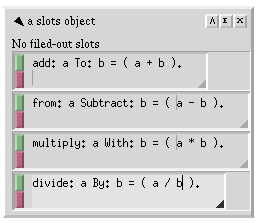
Creating the objects on the slot.
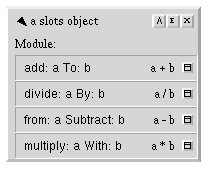
The final version of the object.
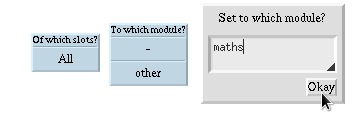
First, let’s define the module for the slots on this object. Middle-click on
the object’s header (the part with a slots object) and select Set Module...
Select All slots, and select module as other. For name, we can enter
maths and then click Okay.
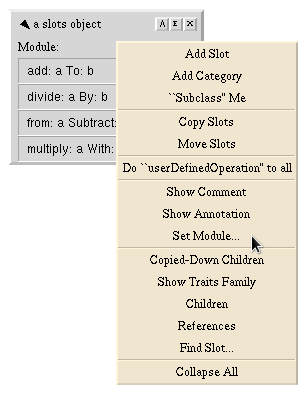
Selecting
Set Module.
Steps of setting module
to maths.
Self will warn us that the module we are trying to save to does not exist, but
we already know this. Click on Create it!
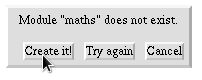
Self telling us that there is no such module.
Self will then ask us to add this module as a submodule of another. This is good
for organization, but we want this module to be standalone, so leave this
textbox empty and click Okay.
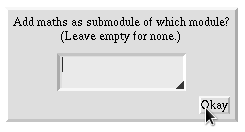
Leaving the parent module empty.
Self will be surprised because we’re creating a new root module, but that’s
fine; click No module.
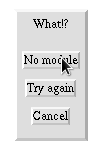
Self is very shocked at this turn of events.
For the final step, we determine which directory our module will reside in. The
directory applications is fine, so let’s just accept the default.

Selecting the directory of the application.
And there we go, we just created our first module.

The object
now displays the module as maths.
But wait! If we file out our module now, we will not be able to reach the slots
we just created in any form. This is because the object we created has no
creator slot. If you recall from earlier, we said that objects need to have a
well-known creator slot to be filed out. A very simple way to do this is to
just put our slot on globals, as most modules do.
Let’s add a new slot to globals as we did previously with other objects. If
you cannot find the “Add Slot…” option in the object menu, make sure you are
clicking on the outliner’s header area. For now, we are setting it to nil,
because we will be setting it to our object later on.
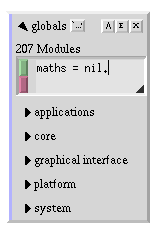
Adding a new slot to global.
The newly added slot.
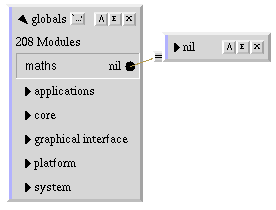
We can now carry the connector that’s currently connected to nil, and drag it
over the object we have created.
Dropping the connector on the object.
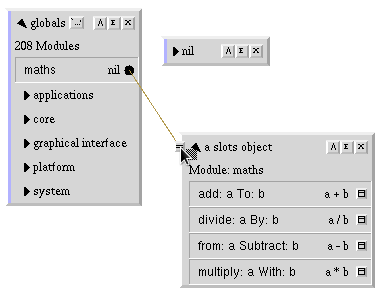
If done right, maths will now show a slots object as its value. But we’re
not done yet; we now have the slot correctly set up, but we need to annotate
the creator of our object (which we can now do, because the object is globally
accessible).
Middle-click on our object, and select “Show Annotation”, then set it to maths
and save it with the green button.
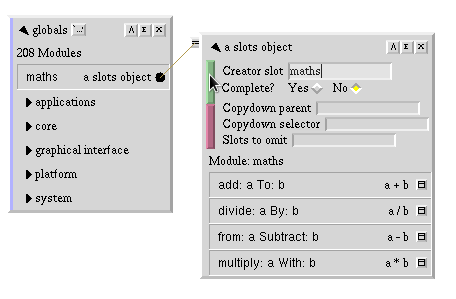
Setting the creator of our object.
At this point, our object (now knowing its creator path) identifies itself as
maths. The object is now globally accessible and ready for filing out.
The object now
identifies itself as maths.
Before we file out, it is often important to check the expatriate slots list.
The Expatriate Slots list contains the slots which exist on well-known objects,
but do not belong to any module in our Self world. We can check it by
middle-clicking the background, selecting Changed Modules (which will list our
module), and middle clicking on the Changed Modules morph and selecting
Expatriate Slots (not in any module).
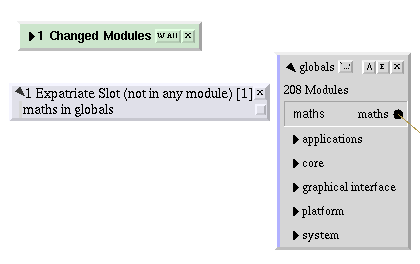
Expatriate Slots list.
And what do you know, we did forget a slot: we never set the module of the
maths slot on globals. Because slots each belong to their own module, we
need to set it so that the maths slot belongs to our module. So let’s middle
click on the maths slot, select Show Annotation, enter the module as maths
and accept.

Annotating the
maths slot.
Now if we middle-click Changed Modules again, the menu item will say
No Expatriate Slots, which means we correctly assigned modules to all our
slots and can now file them out.

We don’t have any other expatriate slots.
To write out our module, simply click the W All button on the
Changed Modules morph, which will file out all changed modules. It should
briefly flash a window mentioning writing out maths, and the title should
change to No Changed Modules. You can now find the maths.self file in
applications in the same directory as Self if you’re running the kitchen sink
snapshot, or in objects/applications in the parent directory if you’re running
the Morphic snapshot.
Filing in modules
To end this post, let’s file in the module we just filed out. Quit Self by
selecting Quit > Just quit from the background menu, then open it again. Our
maths object will be gone from globals, but we can add it back in now that
we have filed our module out. Select New shell from the background menu, open
a new prompt by clicking the “E”, and enter the path of the .self file relative
to where you executed Self, followed by runScript.
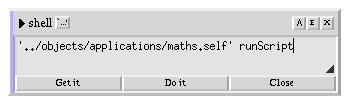
Filing in our
maths module.
Once you click Do it, and open “Globals” from the background menu, you should
see maths there.
I hope you enjoyed this blog post. There is still a lot to cover about Transporter, and Self in general, so there will be more posts to come. In my next post, I will take a look at the Morphic user interface, and how to build simple interfaces in it. Stay tuned!
As a final tidbit, you can file out the standard modules in the snapshot by selecting “All Modules” from the background and clicking “W” for the module from the menu you get. This way, you can look at the standard library source in text form.
-
If you want to know more about how the summarization process works, you should dig into
pluggableOutlinerandselfCatOrObjModel. ↩︎ -
An object is well-known if it has a known path from
lobbyto itself. This is important because this is how you and others will access your module’s objects and slots. ↩︎ -
When an object
isComplete, it accepts theprintString(the string representation of this object when printing) andstoreString(the string representation when filed out into a module) messages. It also accepts a few more messages; check out the handbook if you’d like to know more. ↩︎